
Network
Manage your server's connection address, ports, and custom domains.
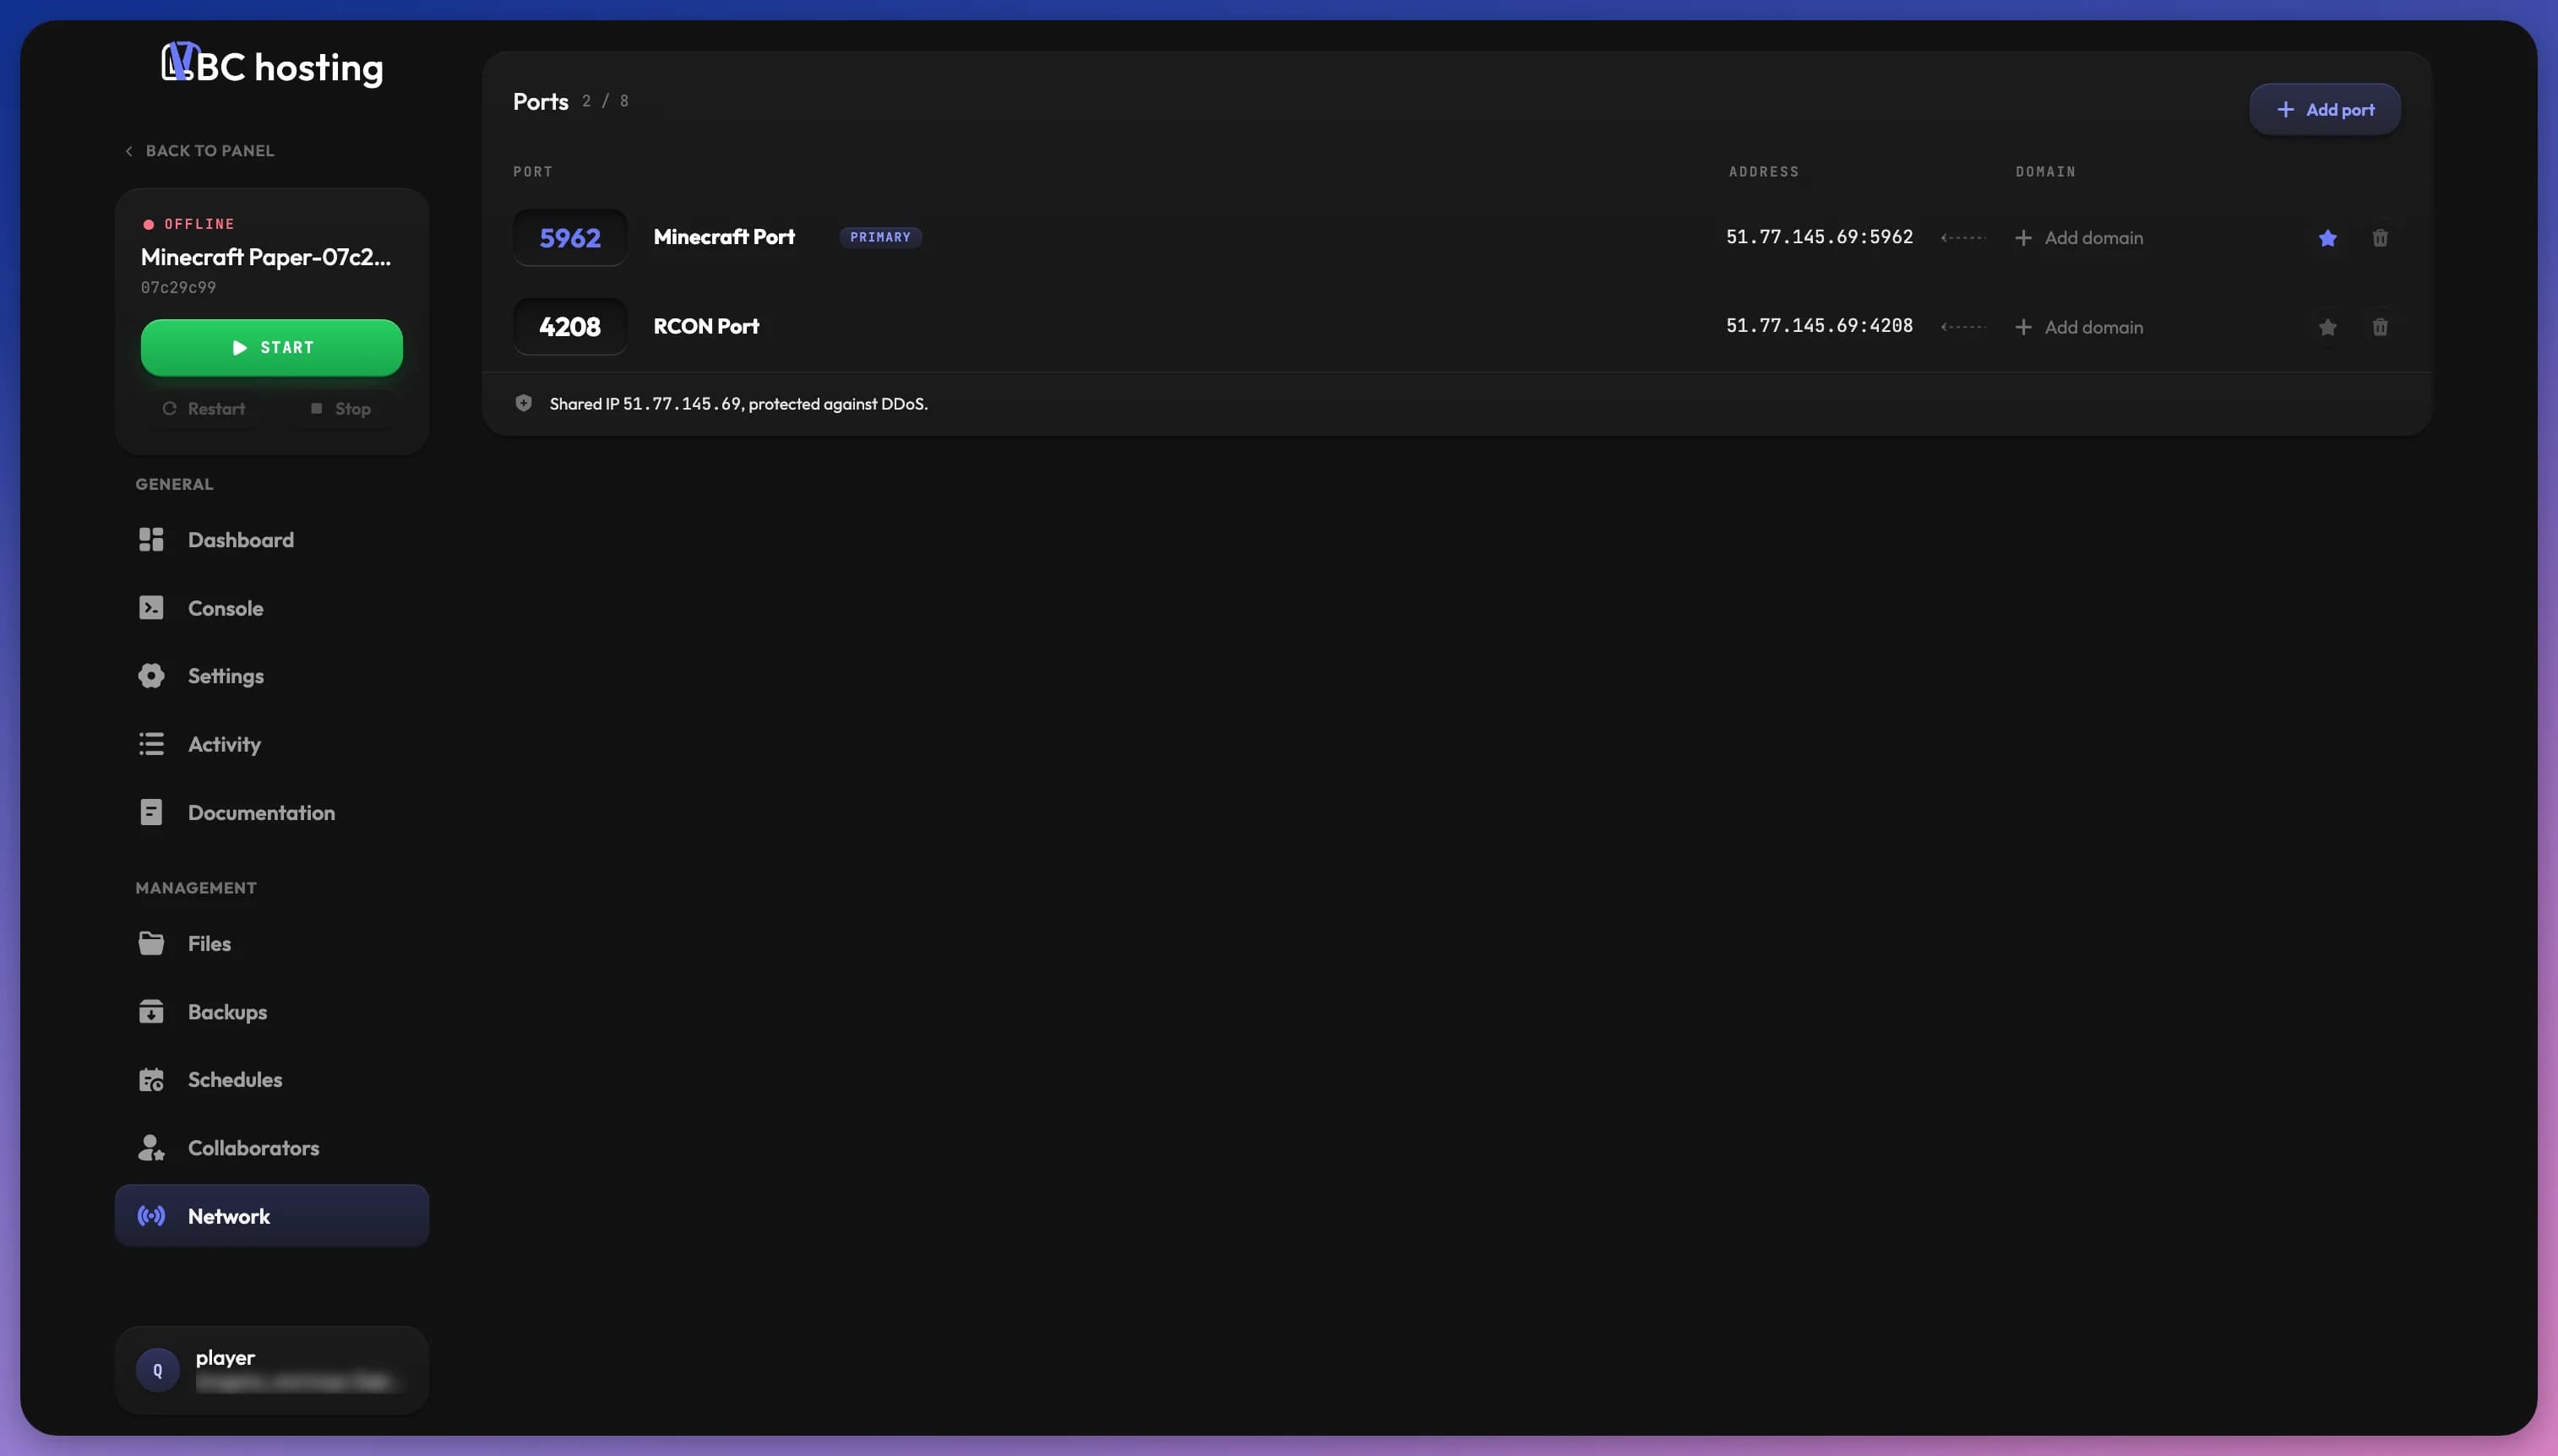
The Network page is where you control how people reach your server. It lists your ports and lets you connect a custom domain to each of them.
Ports
The Ports card lists every port of your server, with how many you use out of your plan's maximum (for example, 2 / 8). Each row shows:
- Port: the port number and its name. Click the name (or Name this port) to label what the port is used for, like "RCON Port".
- Address: the full address to connect to, for example
51.77.145.69:5962. When your server has a hostname alias, the address uses it instead of the raw IP, so it keeps working if the IP changes. - Domain: the domains connected to this port, or Add domain.
The footer shows your server's IP and whether it is shared or dedicated, for example "Shared IP 51.77.145.69, protected against DDoS."
Primary Port
The primary port is the default port for your server, marked with a PRIMARY badge and a filled star. It is normally the one used to connect to the server itself. To change it, click the star on another port to set it as primary.
If your game has a game port setting, the primary port follows that setting, and only that port can be primary. To use another port, change the setting itself.
Adding a Port
Some games or applications need extra ports. For example, Minecraft plugins such as DynMap, PLAN, or Plasmo Voice use additional ports for their web interfaces or for voice chat, and some games use extra ports for RCON or other tasks.
- Open the Network tab for your server.
- Click the Add port button.
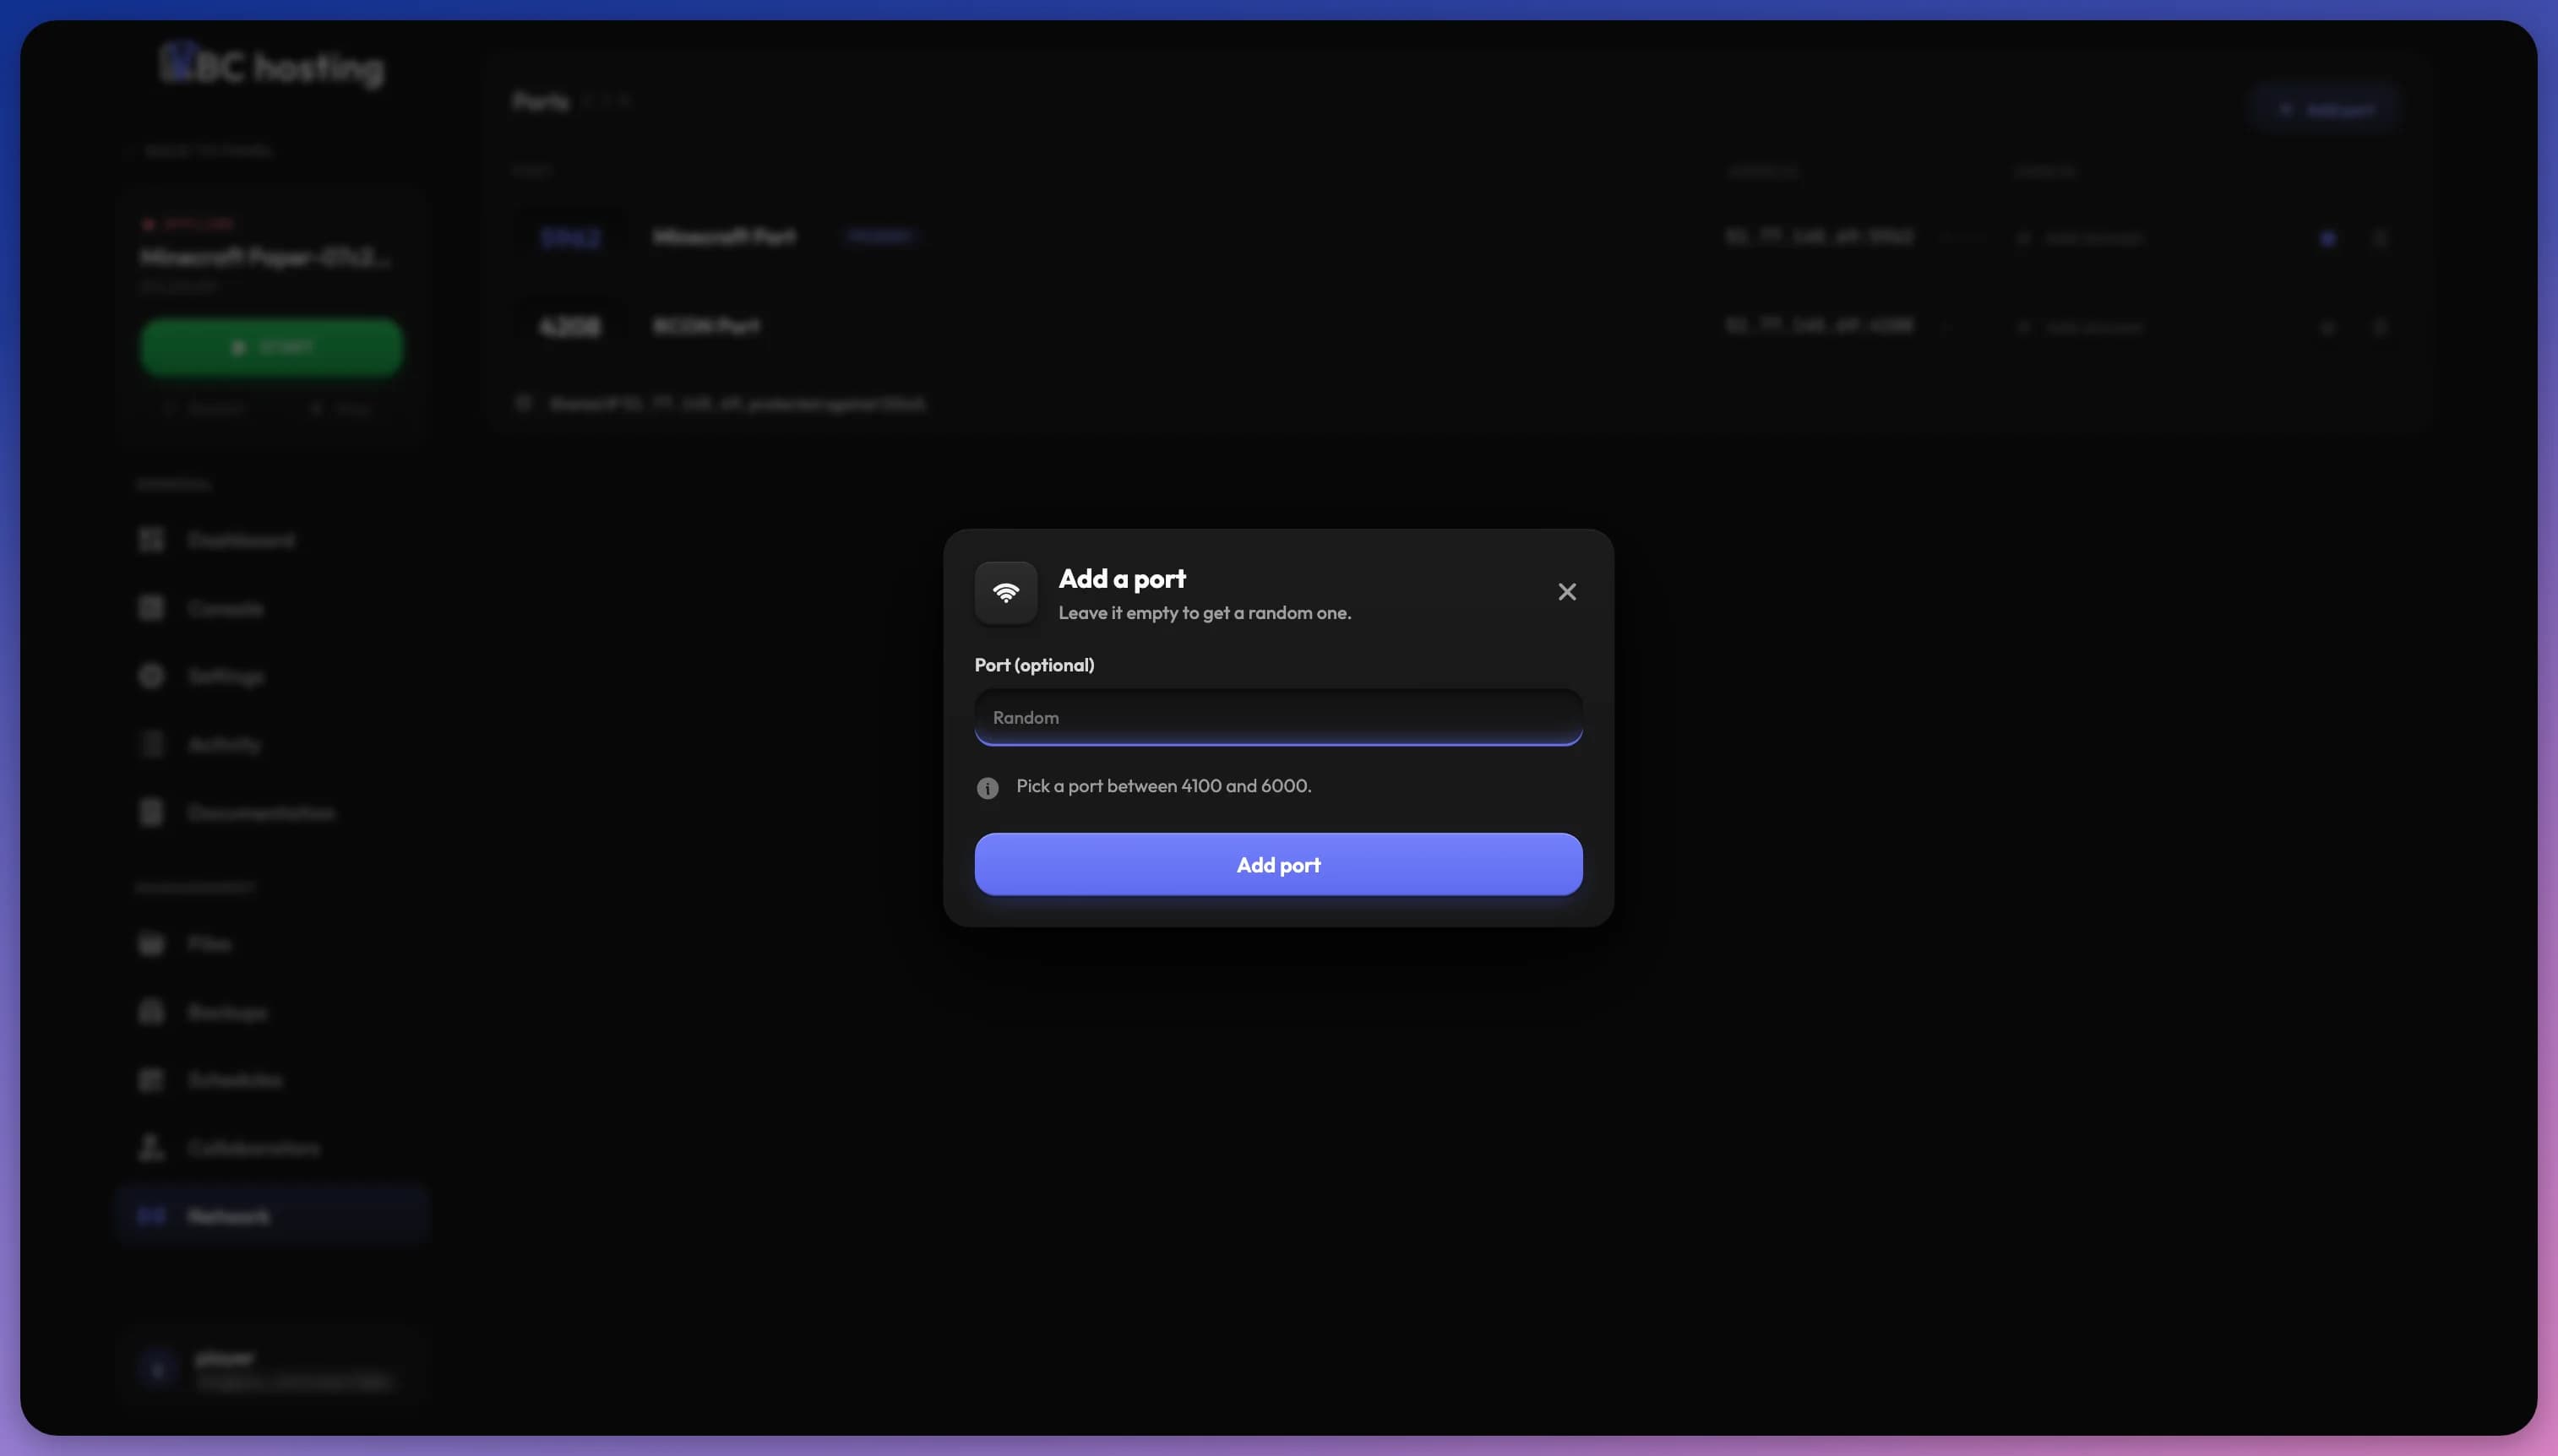
- In the Add a port dialog, leave the port empty to receive a random one, or enter a specific one. If a port range is configured, the allowed range is shown (for example, "Pick a port between 4100 and 6000").
- Click Add port.
The number of ports available depends on your plan. Once you reach the maximum, the Add port button is disabled.
Removing a Port
Click the trash icon on a port to remove it. It is removed from your server right away. You cannot delete the last remaining port.
Some ports are tied to a startup variable for your game or application. These show Managed by a variable, and cannot be removed because the game manages them for you.
Domains
Instead of sharing a raw IP address, you can connect a custom domain so players reach your server at a name like play.example.com. Each connected domain appears in the Domain column of its port, with a DNS status dot. Hover it to see the status:
- Green: DNS is configured correctly and pointing at your server.
- Amber: verification is pending, or DNS is not yet pointing at your server.
- Red: the domain could not be verified. Double-check the domain name and your DNS records.
Next to a domain, you can Verify DNS again, Change port to move it to another port, or Remove domain.
Domain Names Not Included
LBC does not give you a domain name for free. To use a custom domain, you either buy one through the LBC Store, or bring a domain you already own from a registrar such as Cloudflare, Namecheap, or OVH.
Connect a Domain
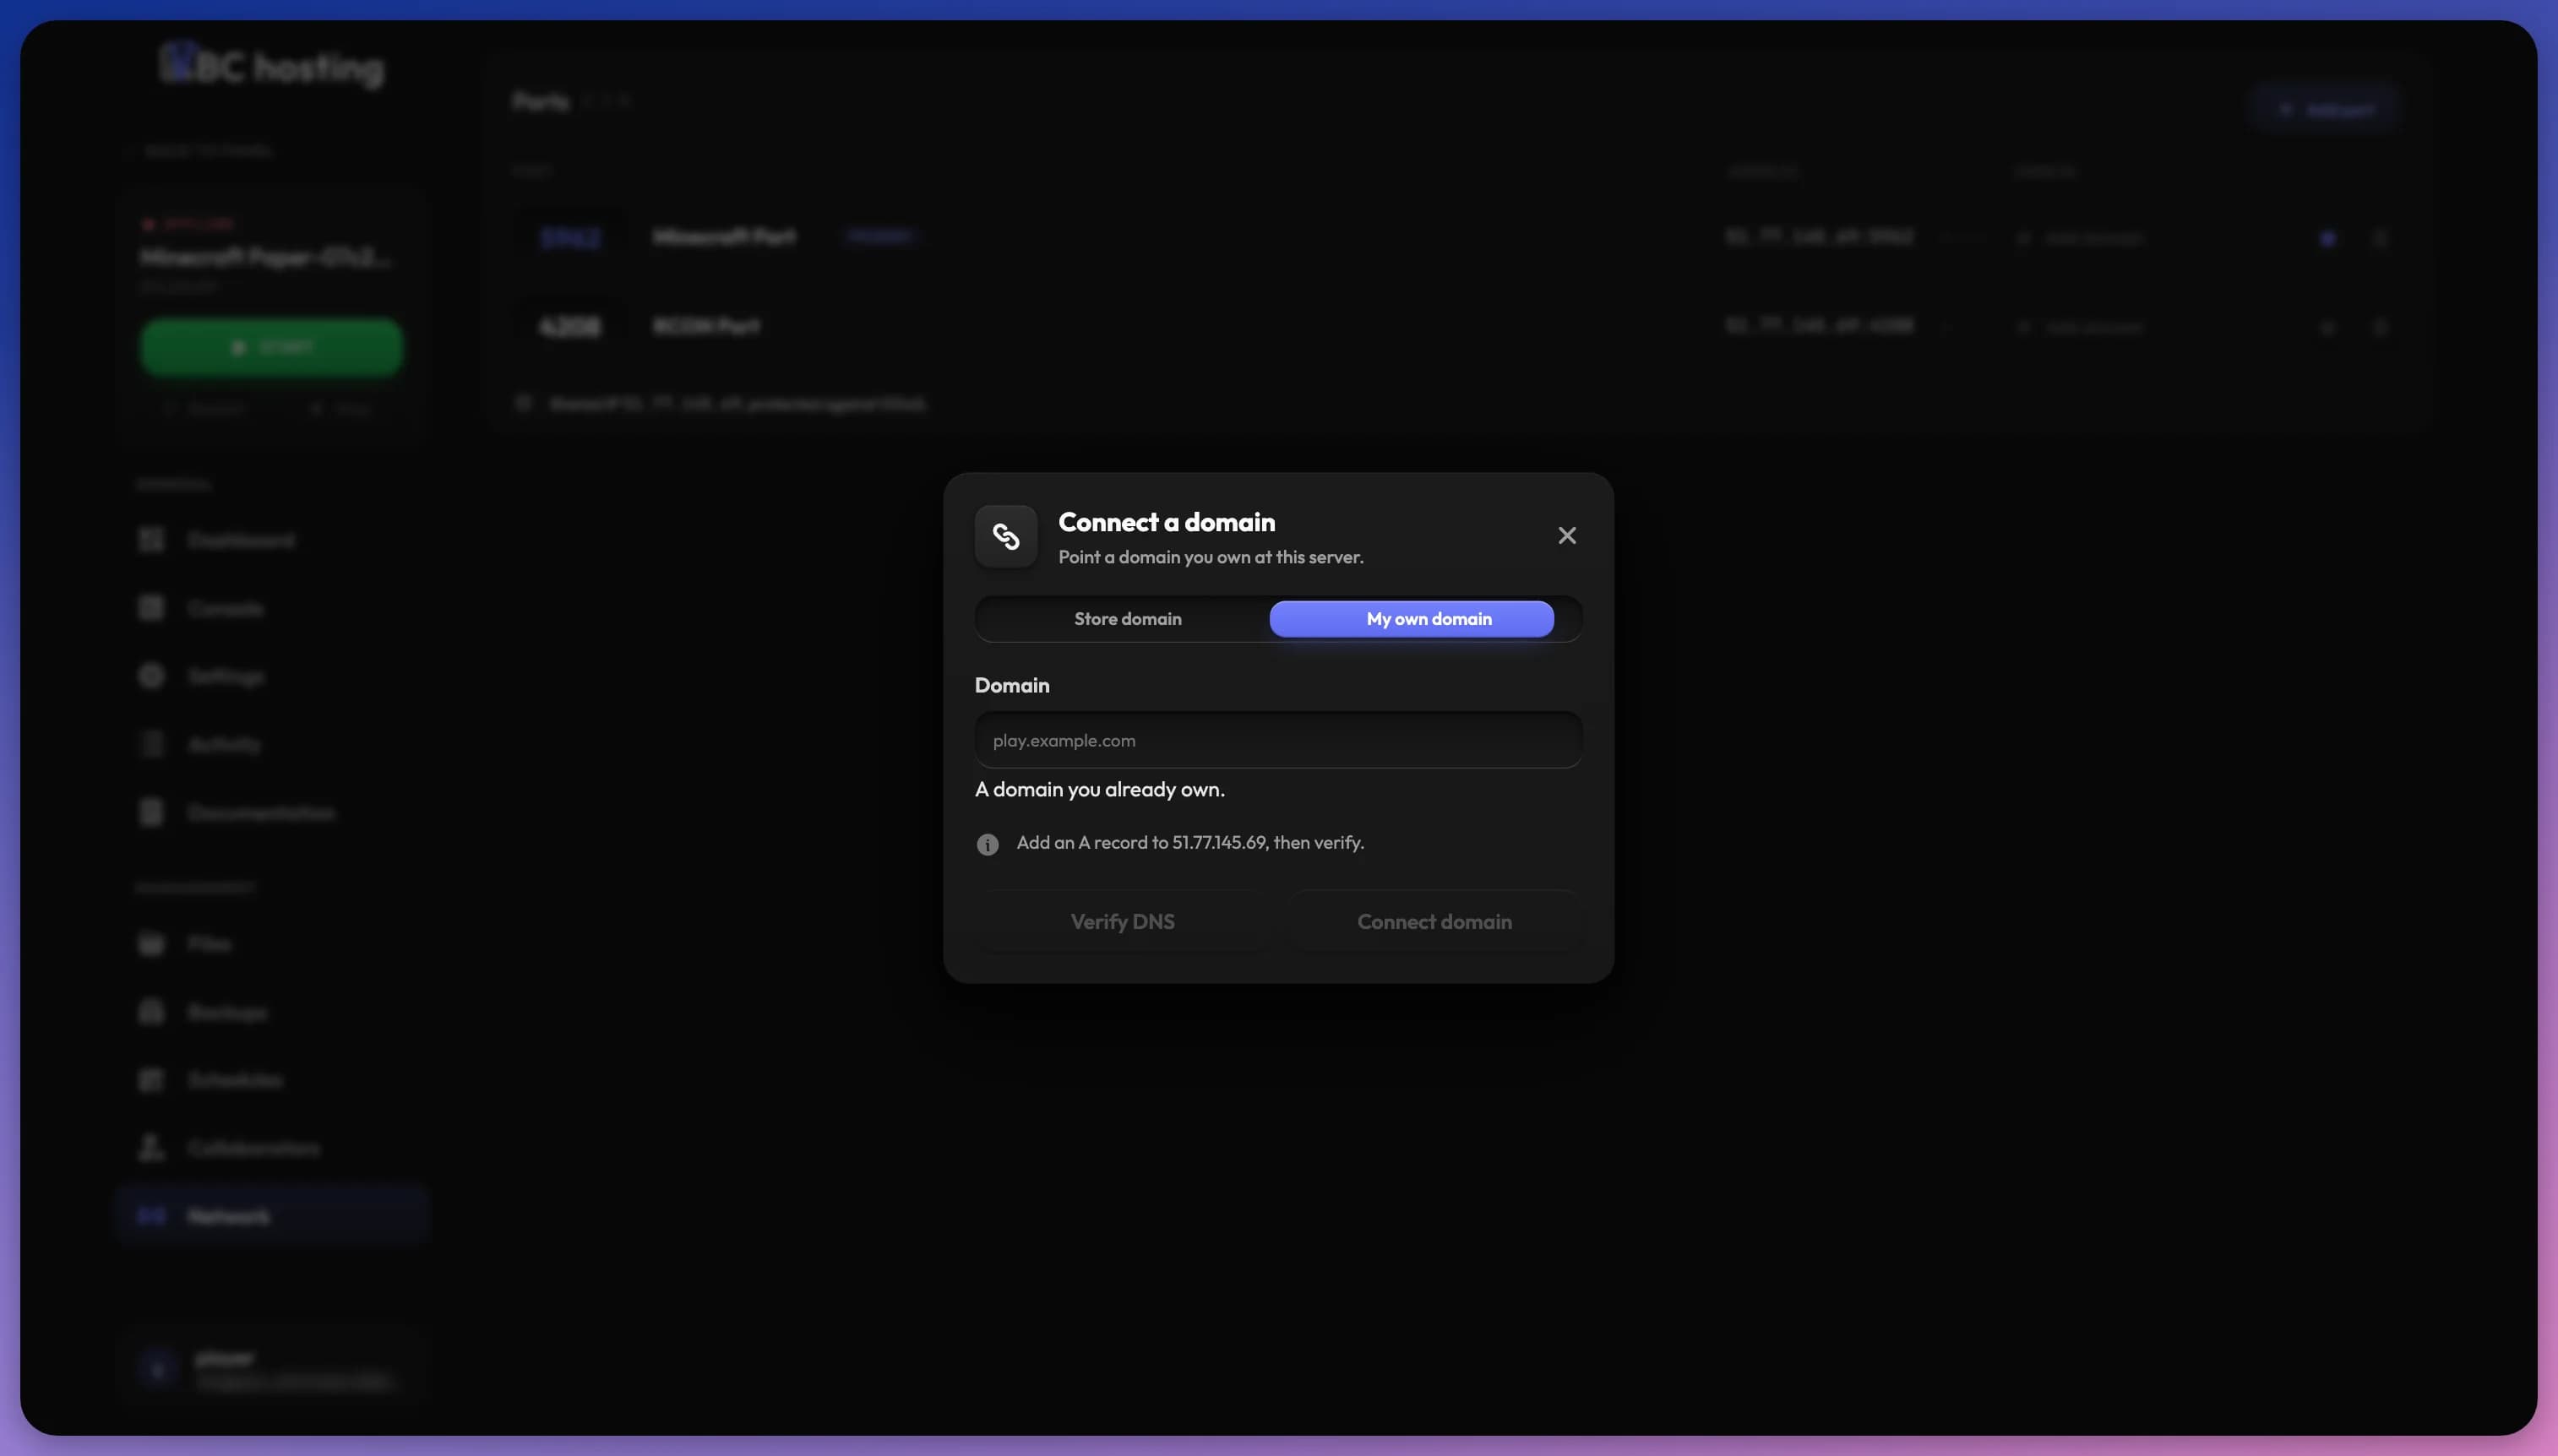
Click Add domain on the port you want to use. The Connect a domain dialog offers two tabs, depending on where your domain lives.
Store domain
For a domain you own through the LBC Store, DNS is created and managed for you automatically:
- Select your domain from the Domain list.
- Optionally enter a Subdomain (for example,
play). Leave it empty to use the root domain. The dialog shows where the domain will point. - Click Connect domain. The panel creates the matching DNS record for you. If a record already exists for that name, the panel asks you to confirm with Overwrite record.
My own domain
For a domain registered elsewhere, you configure DNS at your registrar, then verify it:
- Enter your domain (for example,
play.example.com). - At your registrar, add the record shown in the dialog: a CNAME record pointing to your server's alias, or an A record pointing to your server's IP address. When your server has no alias, only the A record is shown.
- Click Verify DNS to check the record. If it is not ready yet, you can still connect the domain and update DNS afterwards.
- Click Connect domain to finish.
DNS and SSL changes can take a few minutes to apply, and DNS can take up to 48 hours to propagate globally, though it is usually much faster. If verification fails, wait a little and try again.
Once a domain is connected, web applications automatically receive an SSL certificate and become reachable over HTTPS.
Choosing a Registrar
If you don't own a domain yet, you can buy one from any domain registrar. A few popular options:
- Cloudflare: competitive at-cost pricing and excellent DNS management.
- OVH: European provider with good prices and reliable service.
- Namecheap: friendly interface, competitive pricing, free WHOIS privacy.
- Porkbun: low prices, free WHOIS privacy, simple interface.
Domain names usually cost between 10 and 15 USD per year depending on the extension (.com, .net, .gg, and so on). Some extensions such as .xyz or .online can be cheaper, while premium ones like .io can cost more.
Setting DNS Records Manually
When bringing your own domain, these are the records you'll typically add at your registrar.
For a subdomain (CNAME):
| Field | Value |
|---|---|
| Type | CNAME |
| Name | play (or www, app, and so on) |
| Target | Your server's alias, as shown in the dialog |
| Proxy | DNS only (gray cloud) |
For a root domain (A record):
| Field | Value |
|---|---|
| Type | A |
| Name | @ |
| IPv4 | Your server's IP address |
| Proxy | DNS only (gray cloud) |
If you use Cloudflare, keep the record set to DNS only (gray cloud, not orange). LBC already handles SSL and proxying, so Cloudflare's proxy on top causes conflicts.