
Schedules
We'll explain what scheduled actions are, what they're used for, and how to configure them.
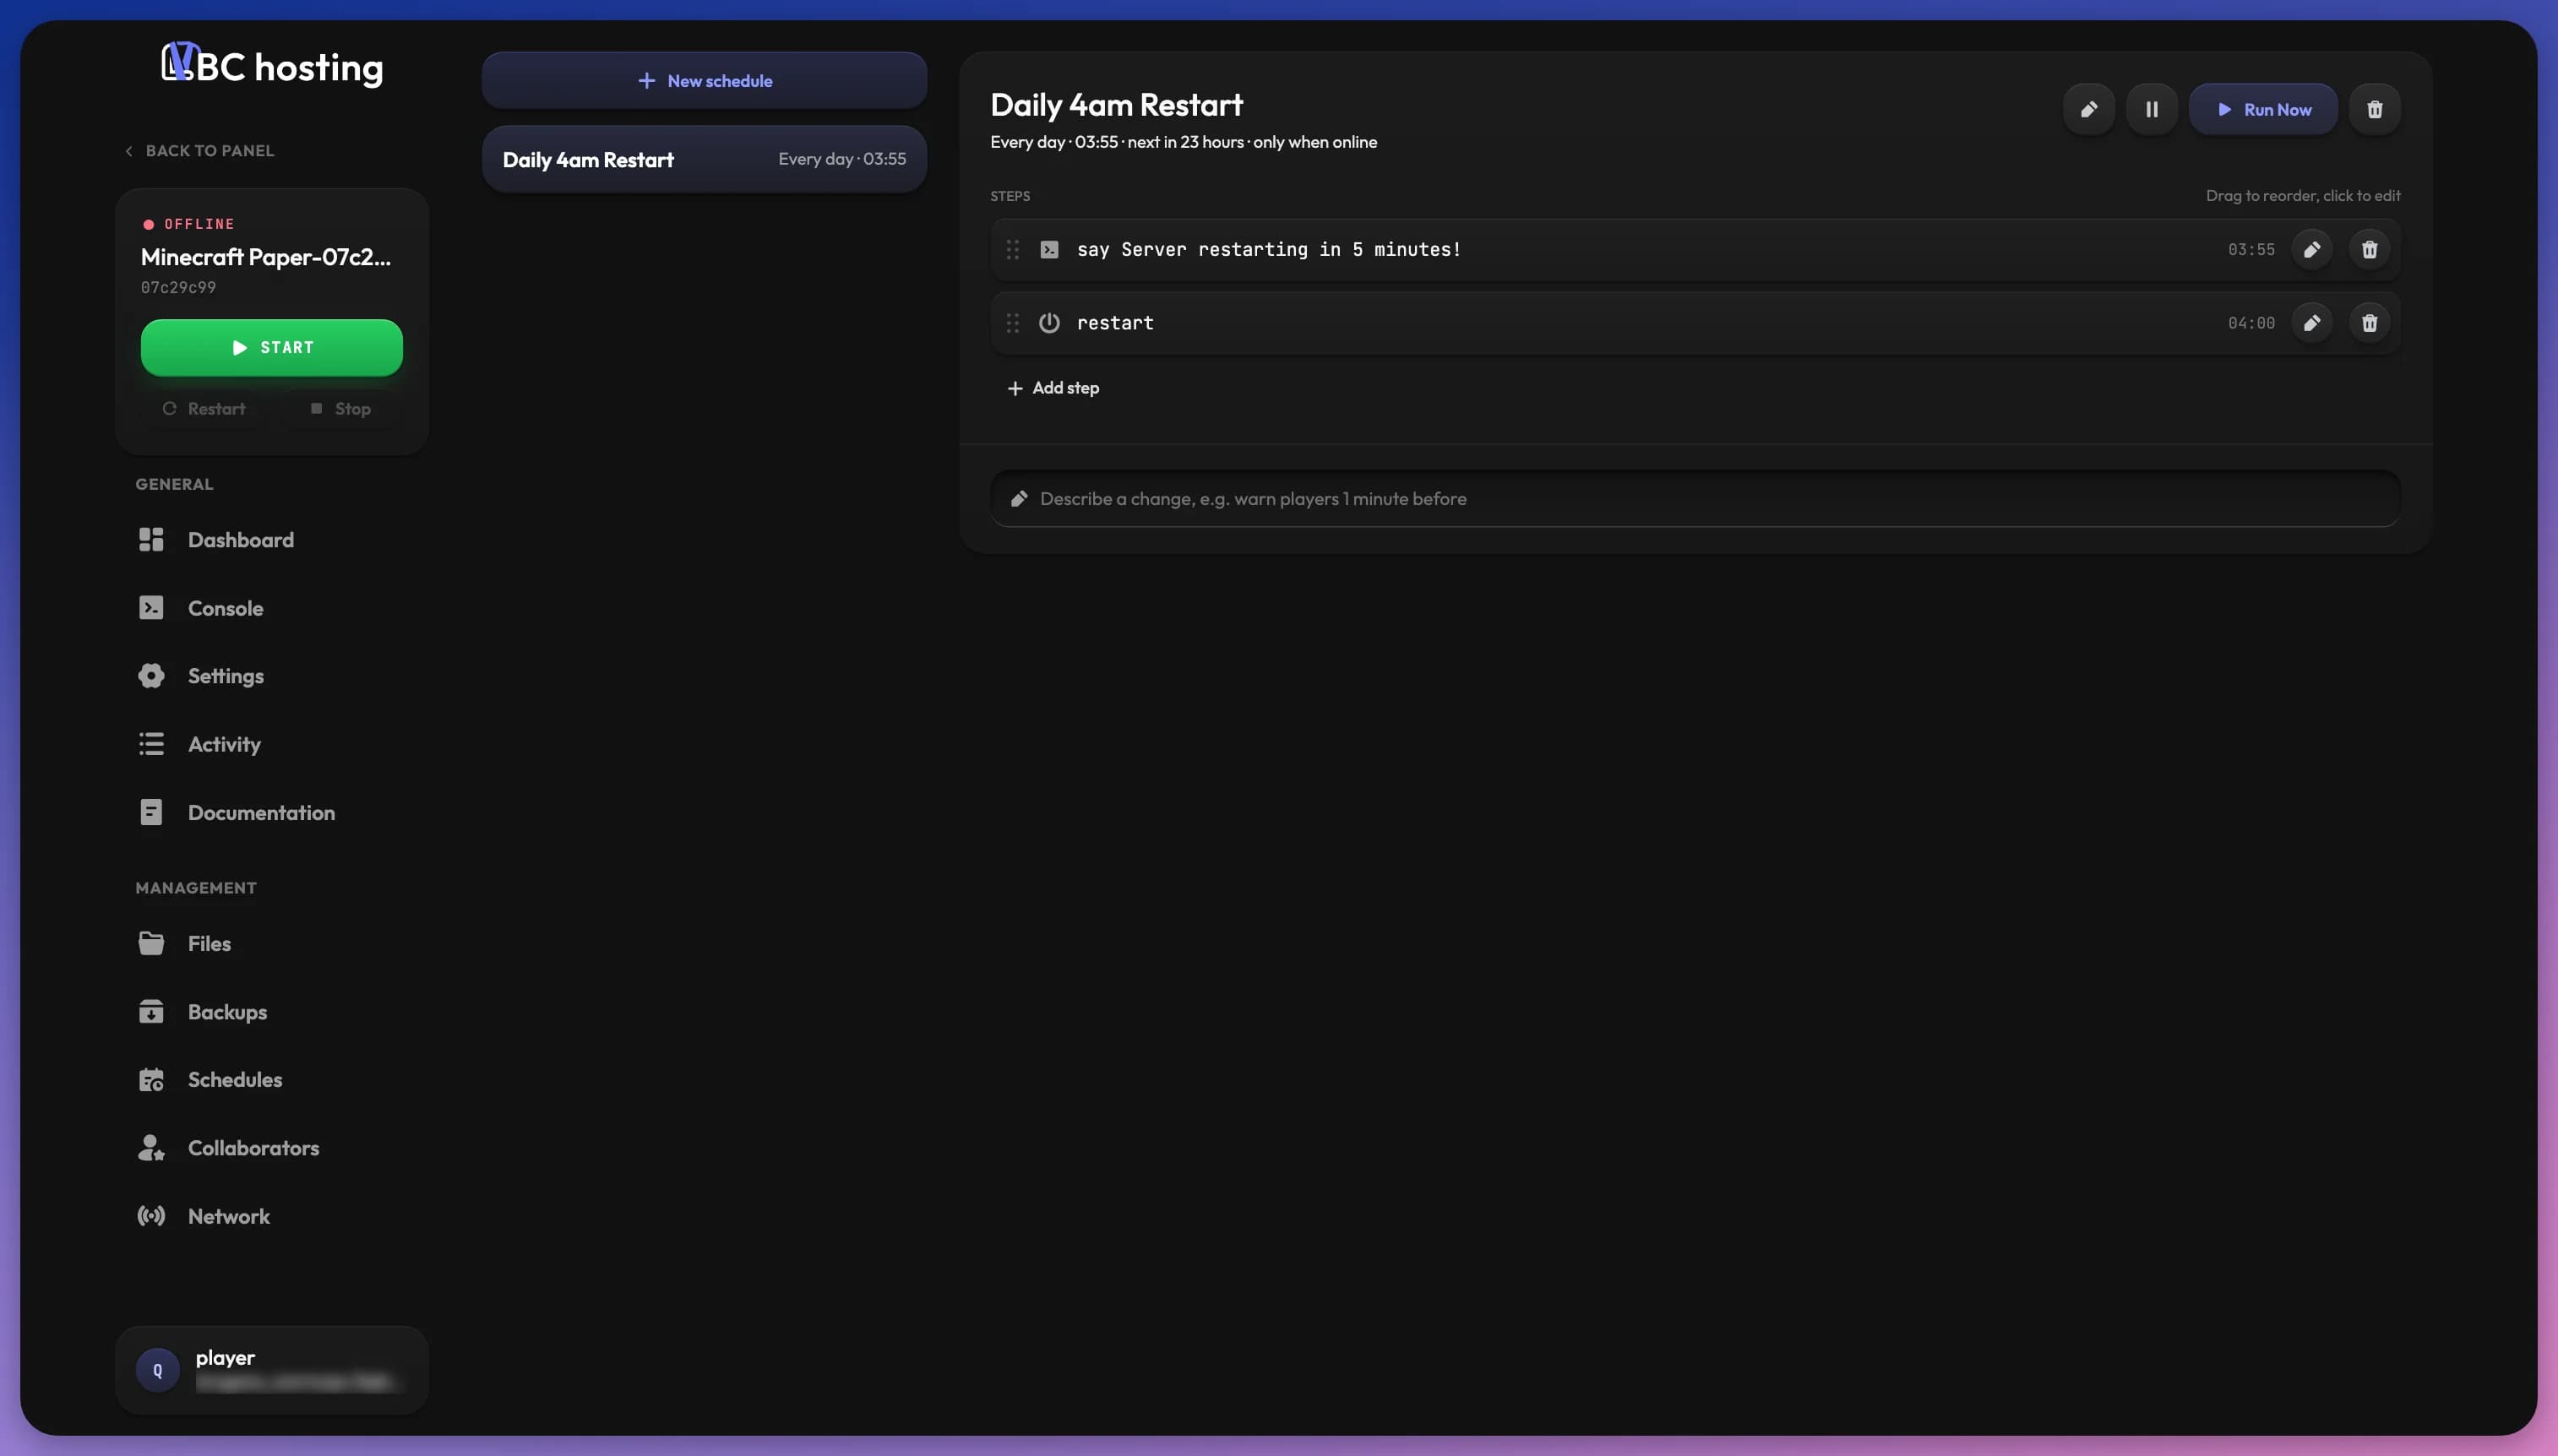
Scheduled Actions let you automate tasks and maintenance without doing them by hand. They save time by running commands, restarts, or other actions at set intervals.
Your schedules are listed on the left with how often they run. Click one to open its details on the right. If you have none yet, the page shows No schedules yet with a button to create your first one.
Activating Backup Cleanup creates a system schedule. It appears in the list with a SYSTEM badge and cannot be modified or deleted manually.
Creating a new Scheduled Action
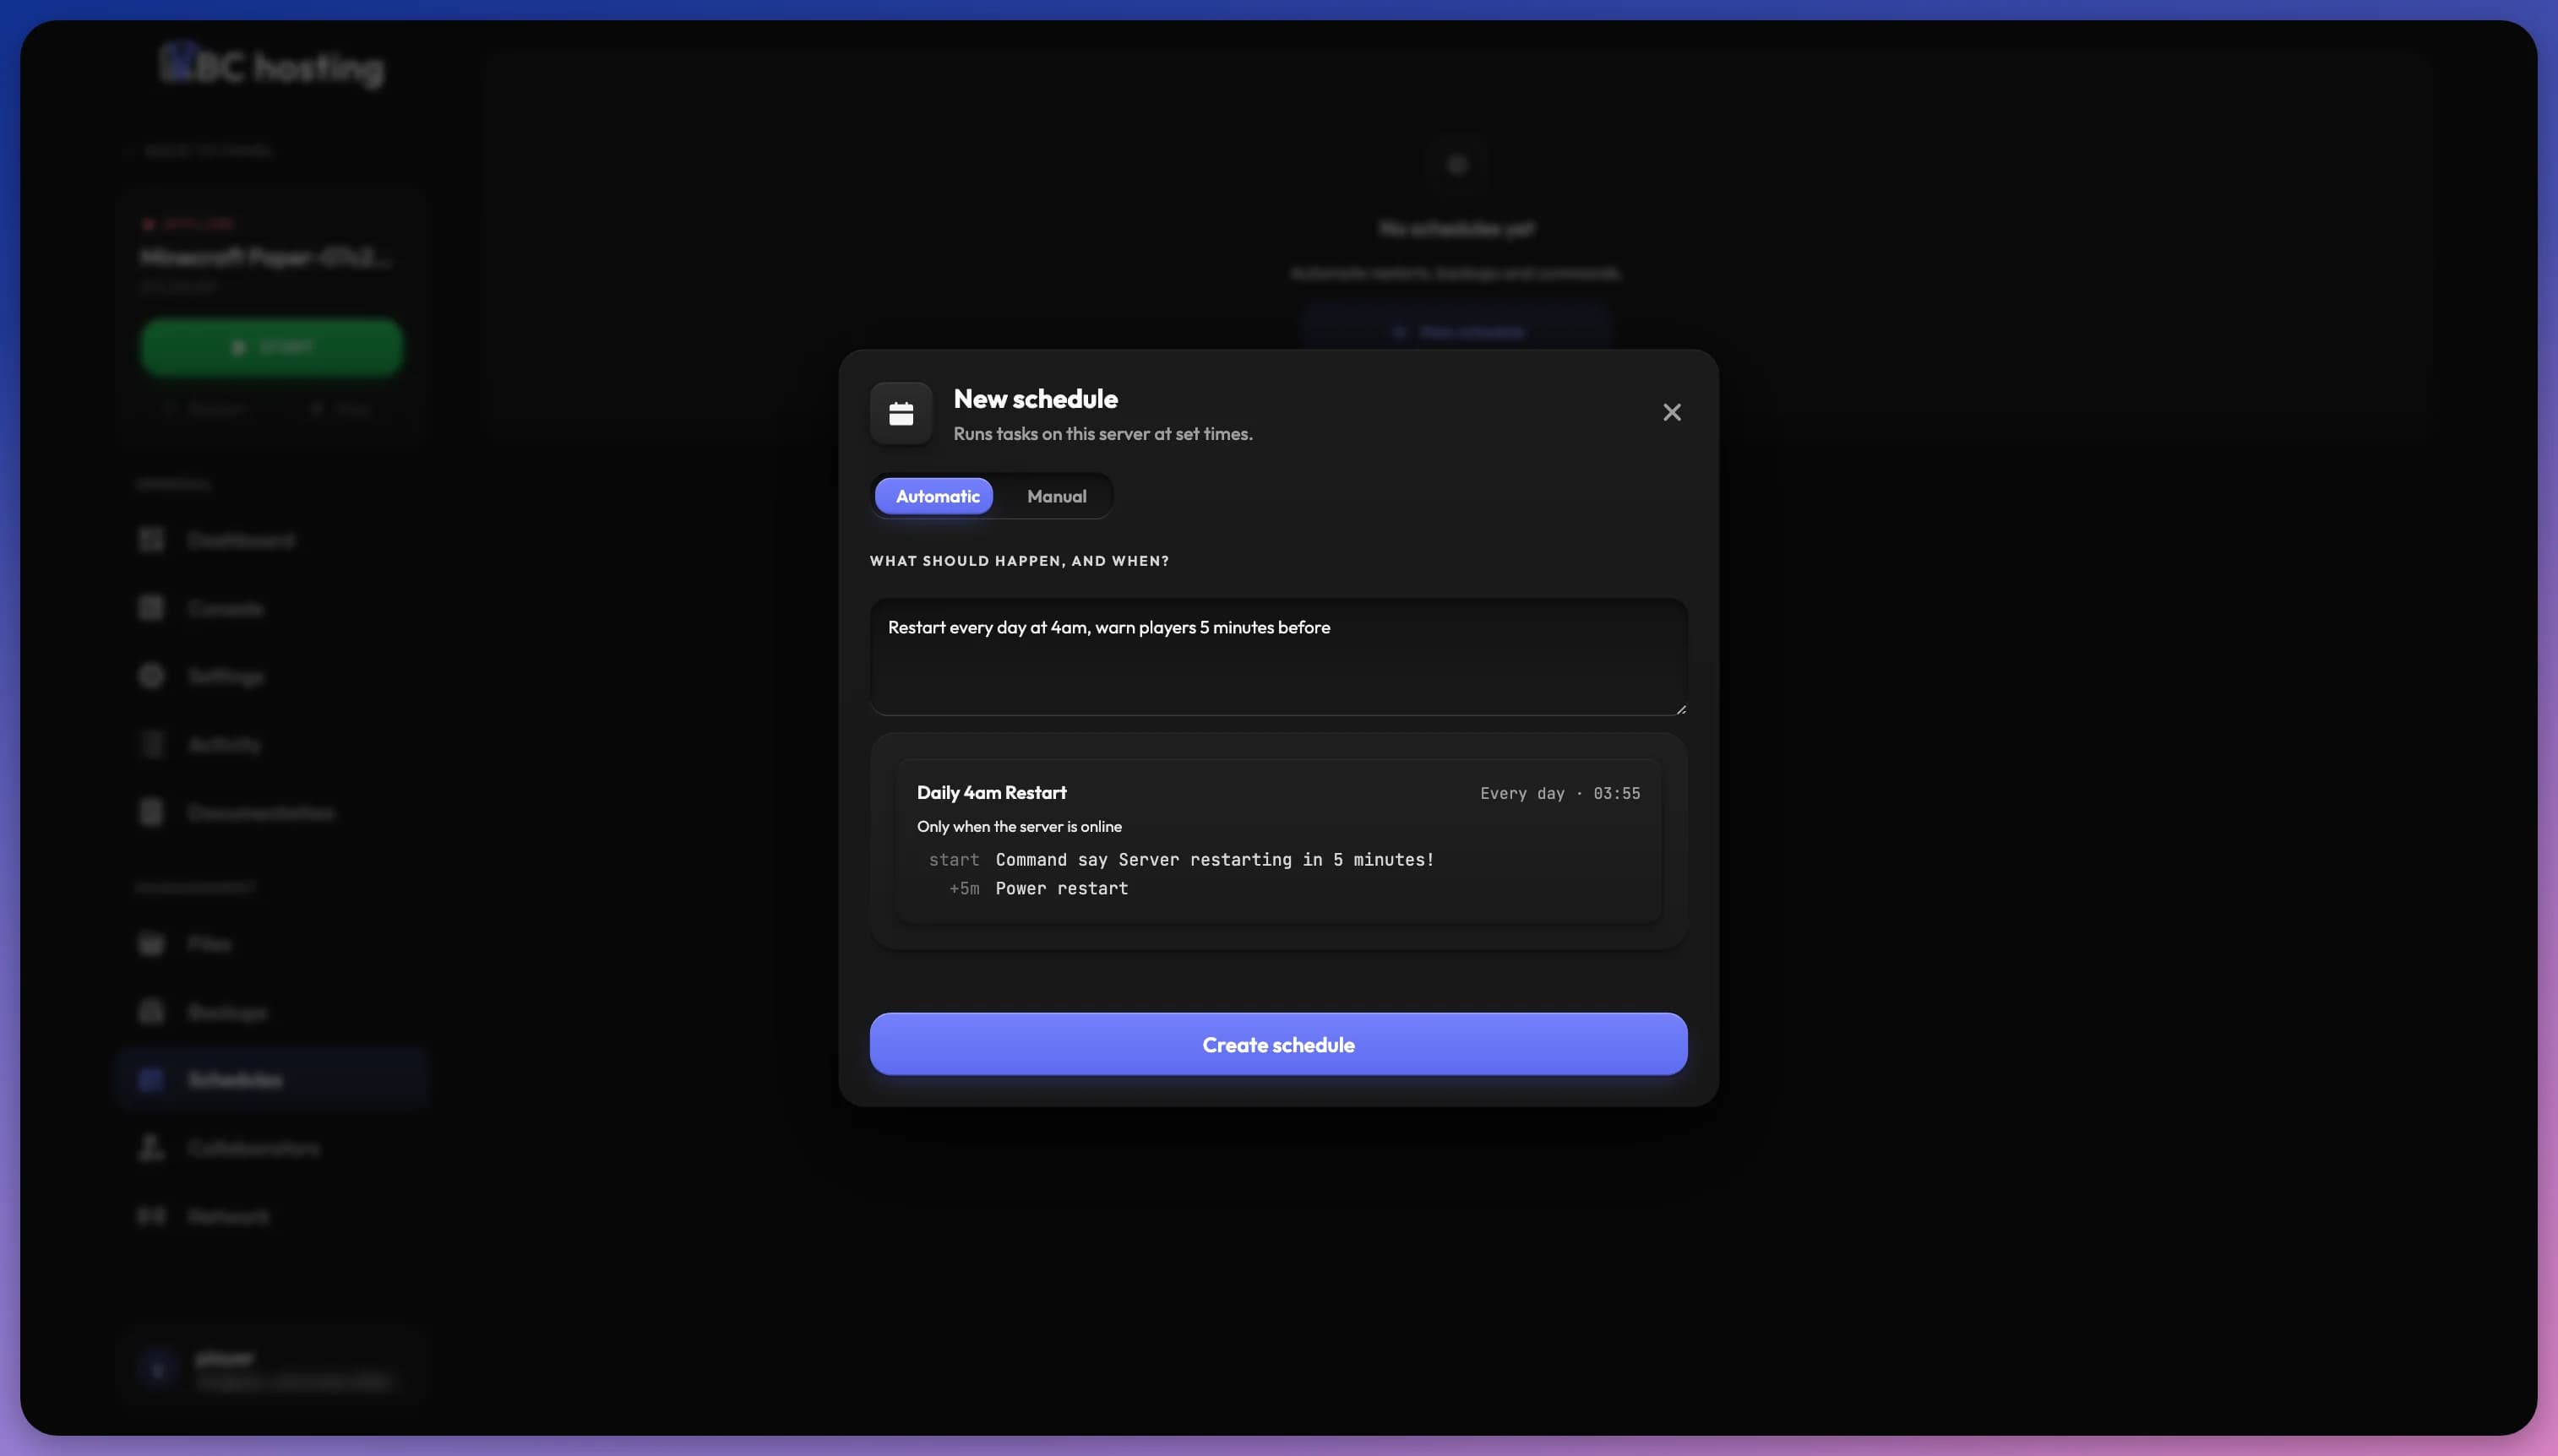
Click the New schedule button to open the New schedule dialog. With Smart features turned on, it has two tabs: Automatic and Manual. Otherwise, only the manual form is shown.
Automatic
Describe what should happen and when in plain language, for example "Restart every day at 4am, warn players 5 minutes before", then click Preview. The preview shows the schedule's name, when it runs, whether it only runs when the server is online, and each step with its timing. If it looks right, click Create schedule. Editing the text drops the preview, so you can adjust it and preview again.
Manual
The manual form lets you configure:
- Schedule name: A human-readable identifier for this schedule
- Schedule Frequency: "Every minute(s)", "Every hour(s)", "Every day", "Every week" or "Every month"
- Interval or time: Set the number for your chosen frequency (e.g., every 5 minutes, every 2 hours), or the time and days it runs
- Custom cron: Switch to a cron expression instead, with a cheatsheet of examples
- Only When Server Is Online: Only execute this schedule when the application is in a running state
Click Create schedule to save it. The same form is used when editing an existing schedule.
Managing Schedules
The top of a schedule's details shows its name, when it runs, when it runs next, and "only when online" if that option is enabled. Next to it you'll find:
- Edit (pencil): Change the name, frequency or online option.
- Pause / Resume: Temporarily disable a schedule without deleting it.
- Run Now: Run the schedule right away.
- Delete: Delete the schedule. Its tasks are removed and a running task is stopped.
Steps
Each schedule runs a list of steps, in order. Click Add step and pick a type:
- Command: Execute a command in your application's console (for games and applications that accept console commands)
- Shell command: Execute a command in a shell in the container, like a cron job. This is useful for applications like websites that need to run scheduled tasks (e.g.,
php artisan schedule:runfor Laravel). Pipes and&&work, and a non-zero exit code fails the task. You can set a timeout (60 seconds by default, 300 seconds maximum). - Power action: Start, restart or stop your application
- Backup: Create a backup of your server. See Backups for details. This is unavailable if your server has no backup storage.
- Wait: Pause the chain for a set duration before running the next step. It is added with a 1 minute wait, click it to change the duration.
Command and Shell command only appear if your application's template allows them.
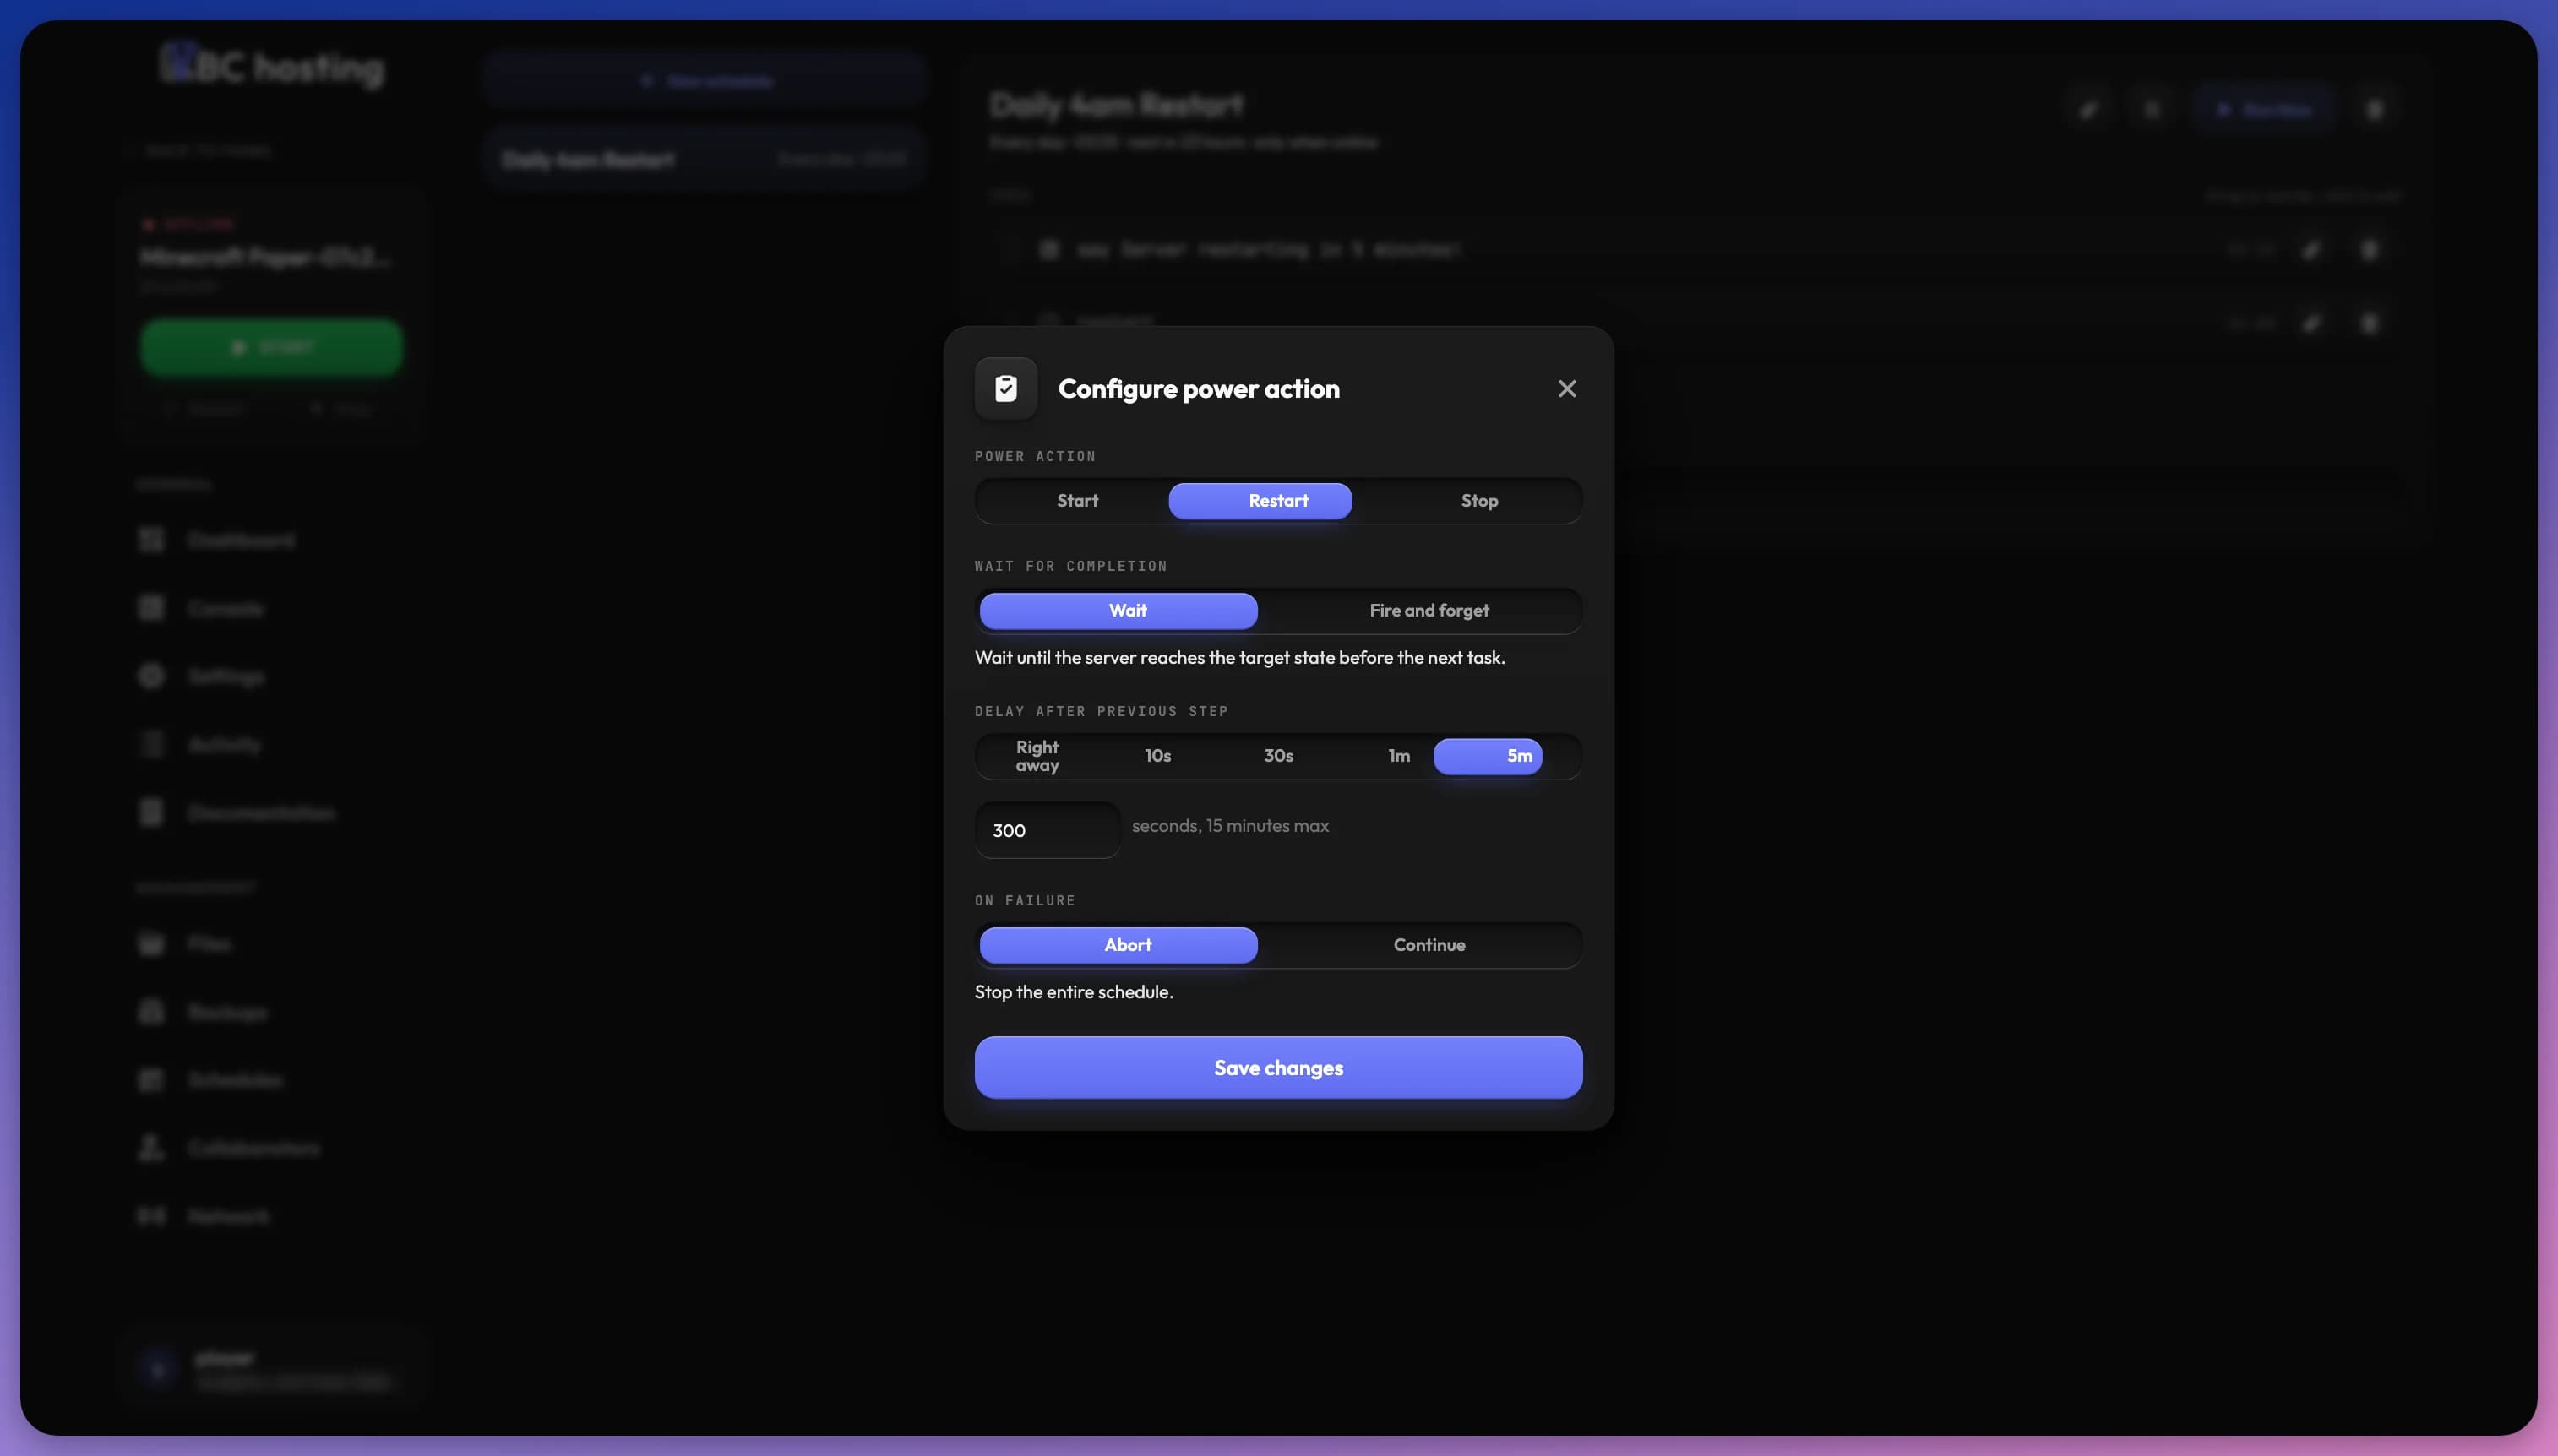
Click a step to edit it. Depending on the type, you can set:
- Power action: Start, Restart or Stop.
- Wait for completion: Wait until the server reaches the target state before the next task, or Fire and forget to move on immediately.
- Delay after previous step: Right away, 10s, 30s, 1m, 5m, or any number of seconds up to 15 minutes. The first step has no delay.
- On failure: Abort stops the entire schedule, Continue runs the next steps anyway.
Drag steps to reorder them, which changes the order in which they run. Use the trash icon on a step to delete it.
If a schedule has a backup step without a stop step before it, the panel warns you. Backing up while the server is running may result in inconsistent or corrupted files.
Describing a change
With Smart features turned on, a box under the steps lets you describe a change to the schedule, for example "warn players 1 minute before". The panel shows the proposed changes next to the current ones. Click Accept to apply them, or Discard to keep the schedule as it is.
Example schedule
For example, let's create a scheduled task to restart the application every 12 hours with a warning message.
We'll use a Minecraft server as an example. Commands may vary depending on your application!
Creating a new schedule
Click the New schedule button and open the Manual tab. Name it "Server auto-restart", set the frequency to "Every hour(s)" with an interval of 12, which means it will run every 12 hours. We'll also enable "Only When Server Is Online" so that this schedule doesn't run if the application is offline. Click Create schedule.
With Smart features turned on, you can also use the Automatic tab and type "Restart every 12 hours, warn players 15 seconds before".
Adding steps to the schedule
Now, let's add the first step. Click Add step, choose Command, and enter say Scheduled server auto-restart in 15 seconds!.
Next, click Add step again and choose Power action. Select Restart and set Delay after previous step to 15 seconds so that the application restarts 15 seconds after the message is sent.
Great! We have created a schedule to automatically restart the application every 12 hours. To test it, click Run Now in the schedule's details.
How does it work
Every 12 hours, the message "Scheduled server auto-restart in 15 seconds!" is sent, and 15 seconds later the application receives the restart task. You can experiment with execution time, number of steps, and even the types of steps.